Wednesday 5 March 2008

Third Task


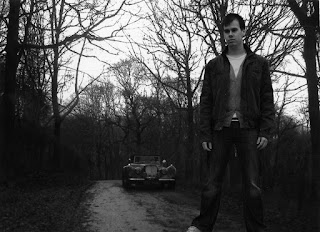
Using the Lasso tool I formed a quick outline around my entire body, then with the paint brush tool I was able to go around the parts of my body which could not be selected by just using the lasso tool, as this would not have produced an ideal and neat pattern around my body. When I had finished going round my whole outline I was able to select this section of the image, this way being able to place it in another image.


Scanning in an image of my own onto the computer I was able to drag the image of myself on top of this new image. Using the editing tool and the transform tool I was able to change the scale of the cut out image, of myself.


The first image below, which I produced with these tools I feel, does not give the intended affect that I was hoping to capture. I also feel that the scale of myself within the image is too large for the surroundings within the photo and makes me appear as a giant. I am going to try and play around some more with these tools to create a more interesting image.


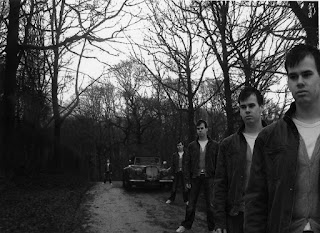
In this last image below, I repeated the cut out, to produce five images of myself on one picture. Mainly focusing on the scale so I wouldn’t look too out of place within the final piece as I did in the first image. I feel this has been quite a successful task as I have picked up a new skill. When doing the second section of this task I hope to create a much more realistic and better quality image.
Tuesday 4 March 2008

Second Task

Firts Image from Task 2


The original image that I used was of Charlotte smoking, I decided to use this as my first idea, as for this project I wanted to create some kind of campaign either for smoking, drinking, obesity etc. So this way I was able to practise with this concept of producing a campaign. As for this second task we were asked to scan in some kind of object or text, so I used a cigarette packet which worked well with my topic, this also included text so it helped make the piece more significant. Once I had scanned the packet into the computer I was able to change the size of the object using the editing tool, I felt this would make the piece more alluring, instead of just one size throughout the picture, as this would make it quite tedious and simple. Once I had every packet covering the first photo, I began changing the opacity of each box one at a time, this crating a transparent affect, with each one being at different scales, some being at a high contrast and some at a low. Overall the opacity tool works well and is a useful tool to know. I will probably find a way of using this in my final project.


Second Image from Task 2


Using an image of my own, I began scanning different negatives onto the computer, similar to the first image from task two; I cut out the negatives using the accurate tools, and over layered them onto the image of myself. The negatives that I used are of people who I know, mainly family and friends; I felt this would make it more significant.


Once I had covered the background image up, I began using the opacity tool, to create a similar affect as the first image. The overall image I think works well, and I feel I have accomplished task two quite successfully.

Monday 3 March 2008

Third Task


By bringing up the image of my own onto Photoshop, I was able to produce a knew layer, this allowing me to merge the image with the other two, simply by dragging the picture over the top of the main image. I then simply just change the opacity level to create this transparent affect, which I used in the previous task.


As you can see in this first image there is mixture of four images combined together in one image, however I felt this looked too over cramped and also made it confusing for the viewer to see what is what. So I removed one of the previous images, I felt this made the final piece quite a success.